

Table of Contents
- Importance of Wood Glue Drying
- The Factors That Influence Drying Time for Wood Glue
- Recommended Drying Times for Different Types of Wood Glue
- Tips and Techniques to Ensure Proper Drying of Wood Glue Before Removing Clamps
- When is it Safe to Remove Clamps After Applying Wood Glue?
Importance of Wood Glue Drying
Proper drying time is important when it comes to using wood glue for various woodworking projects. Understanding the importance of allowing sufficient drying time can greatly impact the strength and durability of your bond.
Wood glue requires a specific amount of time to dry and cure properly. This timeframe can vary depending on factors such as temperature, humidity, and the type of wood glue being used. It is important to follow the manufacturer's instructions for recommended drying times.
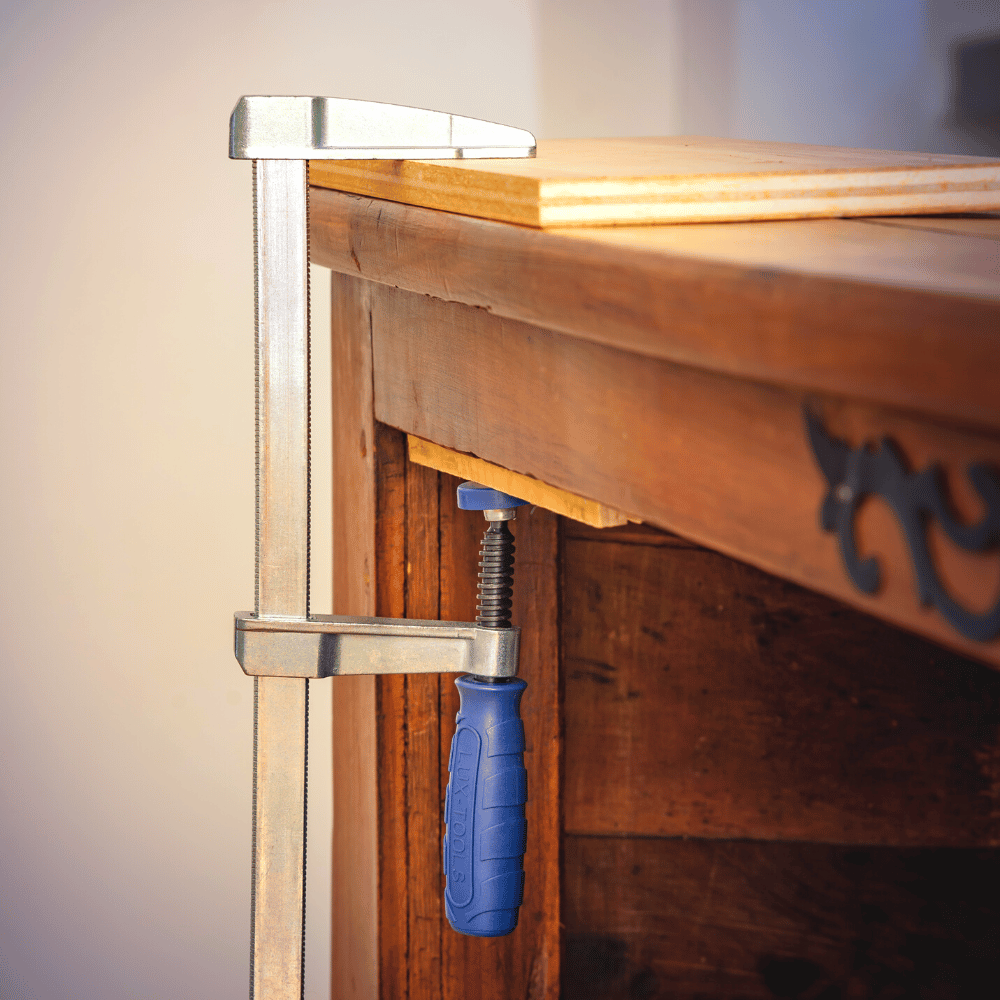
One key aspect to consider is the clamping time for wood glue. By using a best woodworking clamp, it helps ensure that the pieces being joined are held firmly together while the glue dries. The recommended clamping time can also be found in the instructions provided by the manufacturer.
It is essential to leave clamps on until the wood glue has fully dried and cured. Removing clamps too soon can result in weakened bonds or even complete failure of the joint. The exact duration will depend on factors such as temperature, humidity, and type of wood glue used.
During the drying process, it is advisable to allow ample ventilation in order to facilitate proper evaporation of moisture from both the wood and the adhesive. This helps prevent any trapped moisture that could compromise adhesion or lead to warping or other issues with your project.
The Factors That Influence Drying Time for Wood Glue
- Humidity and Temperature: One significant factor is the effect of humidity and temperature on wood glue drying time. High humidity levels can slow down the drying process, as moisture in the air hinders evaporation. Conversely, low humidity can accelerate drying by facilitating faster moisture evaporation. Temperature also plays a role, as higher temperatures generally speed up the drying process, while lower temperatures slow it down.
- Type of Wood Glue: The type of wood glue used is another important consideration. Different types of wood glues have varying chemical compositions and properties that affect their drying time. For example, some glues are designed to dry quickly for rapid project completion, while others may require longer drying times for stronger bonds.
- Thickness of the Glued Surface: The thickness of the glued surfaces also influences drying time. Thicker layers of glue take longer to dry compared to thinner applications. It is important to follow manufacturer guidelines regarding recommended thicknesses for optimal results.
- Ambient Conditions: Ambient conditions during drying can also impact how quickly wood glue dries. Adequate ventilation helps remove moisture from the glued surfaces and aids in faster evaporation. Additionally, direct exposure to sunlight or heat sources may speed up the drying process but should be carefully monitored to avoid potential damage or uneven curing.
By considering these factors, woodworking enthusiasts can make informed decisions about their projects' timelines and ensure proper bonding for long-lasting results.
Recommended Drying Times for Different Types of Wood Glue
Different types of wood glue have varying drying times, which can greatly affect the success of your woodworking projects. Understanding the recommended drying times for each type of wood glue is crucial to ensure optimal bonding and avoid any mishaps.
- PVA (Polyvinyl Acetate) Glue: PVA glue is one of the most commonly used wood glues due to its affordability and versatility. It typically has a relatively short drying time, ranging from 30 minutes to 1 hour. However, it's important to note that this can vary depending on factors such as humidity and temperature.
- Aliphatic Resin Glue (Yellow Glue): Yellow glue, also known as aliphatic resin glue, is another popular choice among woodworkers. It offers a strong bond and has a longer open time compared to PVA glue, allowing for more extended assembly periods. The drying time for yellow glue usually ranges from 1 to 2 hours.
- Polyurethane Glue: Polyurethane glue is known for its exceptional strength and ability to bond different materials, including wood. However, it has a longer drying time compared to other glues due to its chemical composition. On average, polyurethane glue may take anywhere from 4 to 24 hours or even longer in some cases.
- Epoxy Adhesive: Epoxy adhesive is renowned for its incredible bonding strength and durability in various applications. It consists of two components that need to be mixed before use. The drying time for epoxy adhesive can vary significantly depending on the specific product and application requirements but generally falls within the range of 4 to 24 hours.
It's essential to follow the manufacturer's instructions regarding drying times when using any type of wood glue as these recommendations may differ slightly between brands or specific products within each category mentioned above.
Remember that while these are general guidelines, environmental factors such as temperature and humidity levels can influence drying times. It's always a good idea to allow for additional curing time to ensure the glue has fully set before subjecting your project to stress or pressure.
Tips and Techniques to Ensure Proper Drying of Wood Glue Before Removing Clamps
To ensure proper drying of wood glue before removing clamps, there are several tips and techniques that can be followed.
Firstly, it is important to apply even pressure during clamping. This ensures that the glue is spread evenly across the joint and helps in achieving a strong bond. Uneven pressure can lead to weak spots in the glue joint and affect the overall strength of the project.
Secondly, using adequate clamping pressure is crucial. Too little pressure may result in gaps between the wood pieces, leading to a weaker bond. On the other hand, excessive pressure can squeeze out excess glue and cause uneven drying. It is essential to strike a balance and apply enough pressure to create a tight bond without overdoing it.
Additionally, allowing sufficient ventilation and air circulation around the glued joints aids in proper drying. This helps in expediting the evaporation of moisture from the glue, ensuring quicker curing time. Adequate airflow also prevents trapped moisture from causing issues such as warping or swelling of the wood.
It is recommended to follow manufacturer's guidelines regarding drying time for specific types of wood glues. Different glues have different curing times, so it's essential to read and adhere to these instructions for optimal results.
When is it Safe to Remove Clamps After Applying Wood Glue?
While the exact time may vary depending on factors such as temperature, humidity, and type of wood glue used, there are some general signs to look for to determine if the glue has fully cured and bonded.
Firstly, it is important to follow the manufacturer's instructions regarding drying times for the specific wood glue you are using. These instructions often provide a recommended minimum drying time before removing clamps. However, keep in mind that these times are typically conservative estimates and it is advisable to wait longer for optimal results.
One key indicator that the wood glue has fully cured is when it becomes transparent or reaches its specified color. Most wood glues start off white or yellowish but will dry clear or translucent once fully cured. Carefully inspecting the glued joint can help determine if this color change has occurred.
Another sign of a well-bonded joint is when there are no visible gaps or separations between the glued surfaces. The glue line should be smooth and continuous without any noticeable weak points.
Additionally, gently tapping or lightly knocking on the glued joint can provide insight into its stability. If you hear a solid, resonant sound without any rattling or movement, it indicates that the bond has likely formed properly.
It's worth noting that different types of wood glues have varying curing times. Some fast-drying glues may allow for clamp removal within an hour or two, while others may require several hours or even overnight curing before removing clamps.
By following proper drying times, checking for visual cues, and ensuring a solid bond between glued joints, you can safely remove clamps from your woodworking projects without compromising their structural integrity.
Click or tap below for our top list of the best woodworking clamps on the market!